How to complete an Observation Round
Below is a step-by-step guide on how to complete an Observation Round using Oxevision Observations.
Please note: A patient must be assigned to a room before you can take their observations using Oxevision Observations (OxeObs). Please view the ‘How to assign a patient to an Oxevision room’ module for details on how to do this.
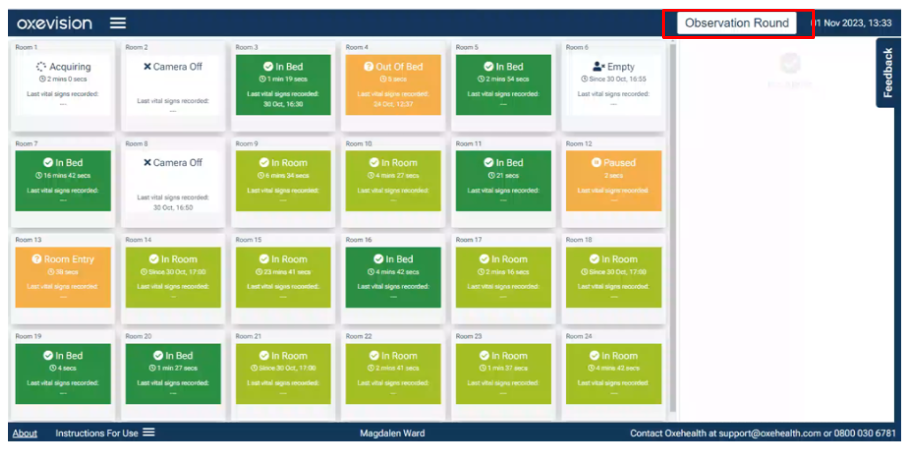
Step 1: To access OxeObs and start an Observation Round, firstly select “Observation Round” on the Room Overview page.
Step 2: On the 24-Hour Overview page, select “Start Observation”.

This page displays a summary of all observations taken within the last 24 hours on a ward1 including:
- The patient’s name.
- The patient’s assigned observations level(s).
- The time each observation was taken and the relevant level.
- A summary of the patient’s last location, presentation(s) and any details and comments recorded during the last observation.
1 If you experience low/no wifi when accessing this page a notification will be displayed above the “24-Hour Overview” title which will state “Your device has low wifi connectivity - information may not be up to date”. If this occurs, please move into an area with sufficient wifi connectivity before selecting the “Start Observation” button.
Step 3: On the Staff Login page, enter your full name and/or your NHS email address and then select the “Login” button.2
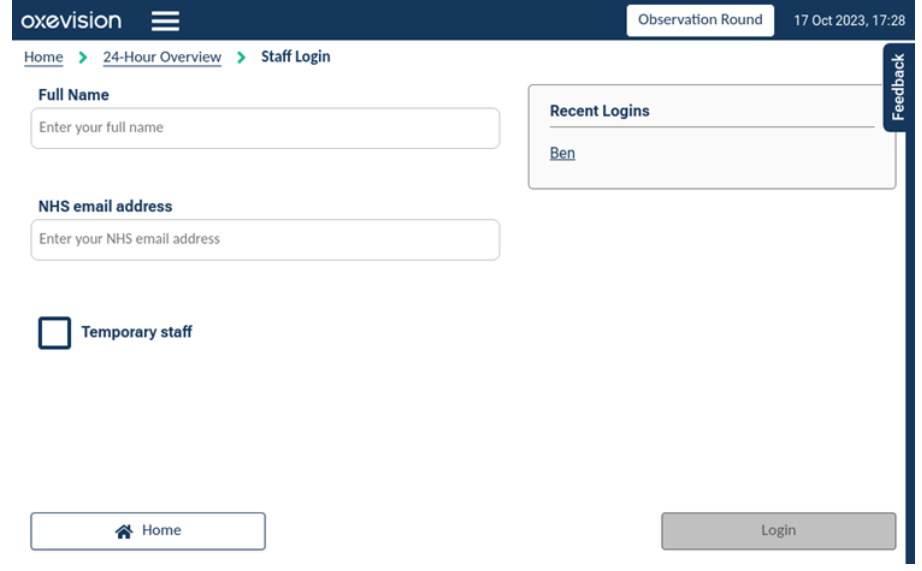
Bank or agency staff should enter their full name, select the “Temporary Staff” checkbox, and type in their “Agency Name” in the textbox provided before selecting “Login”.
You may see your name listed under “Recent Logins” if you have recently logged in. If your name is shown, you can simply select your name which will populate the fields you entered previously - you can then select “Login”.
2 You must have wifi connectivity before selecting “Login” so that Oxevision Observations can populate an up-to-date list of the current patients on your ward. If you have low/no wifi then an “Unable to Login” notification will appear and you will be unable to log in to Oxevision Observations until you have moved into an area with sufficient wifi connectivity. Oxevision Observations has several features to accommodate working in low wifi areas so if you experience low/no wifi after logging in, you can continue to complete your observations. These features will be explained in more detail throughout this guide and in subsequent Oxevision Observations ‘how to’ guides.
Step 4: Once you have successfully logged in, you will be taken to the Observation Round page - select the “Take Observations” button for the relevant patient.
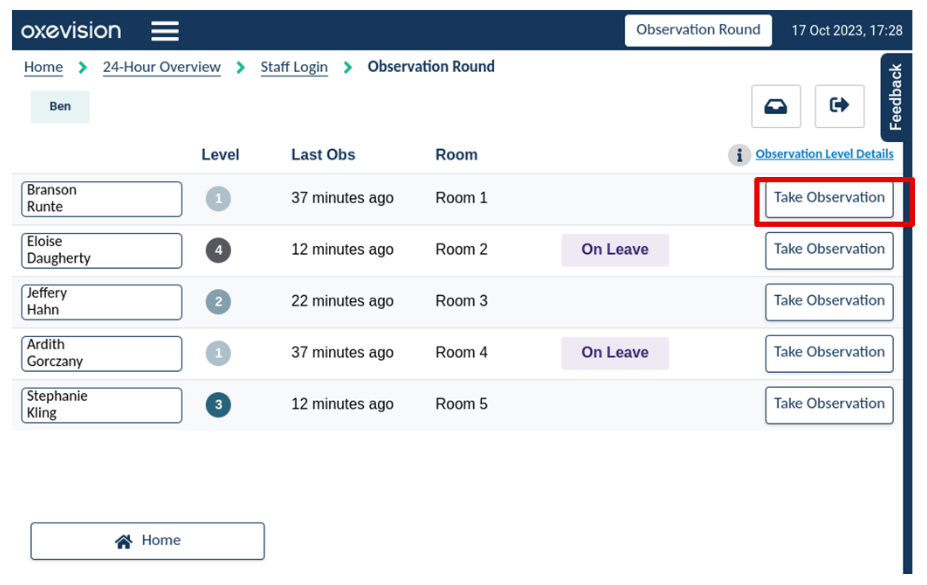
The Observation Round page shows a list of the currently configured patients on the ward including their name, the key of their assigned observation level(s), the time the “Last Obs” was taken, and the room in which the patients are currently assigned to. You can also view a patient’s Observation History by selecting their name - for more details on this, please refer to the ‘How to view and export a patient’s Observation History’ module.
Step 5: Once you are on the first page of the observations workflow, select the patient’s observation level.
.png)
The observation level(s) assigned to the patient is indicated below the buttons. Once an observation level is selected, it will be highlighted with blue shading3 and also appear on the left under “OBSERVATION LEVEL”.
3 If you select a level that is not currently assigned to the patient, this will be indicated by yellow text stating “Note: You’ve selected an unassigned level for the patient”. Observations at unassigned levels can be completed in the usual way, however, if a patient’s observation level(s) has changed, you should update this on the patient’s Patient Configuration page. Please refer to the ‘How to view or edit a patient’s details’ module for a step-by-step guide on how to do this.
Step 6: Select the box on the left under “LOCATION” then select the location of the patient.
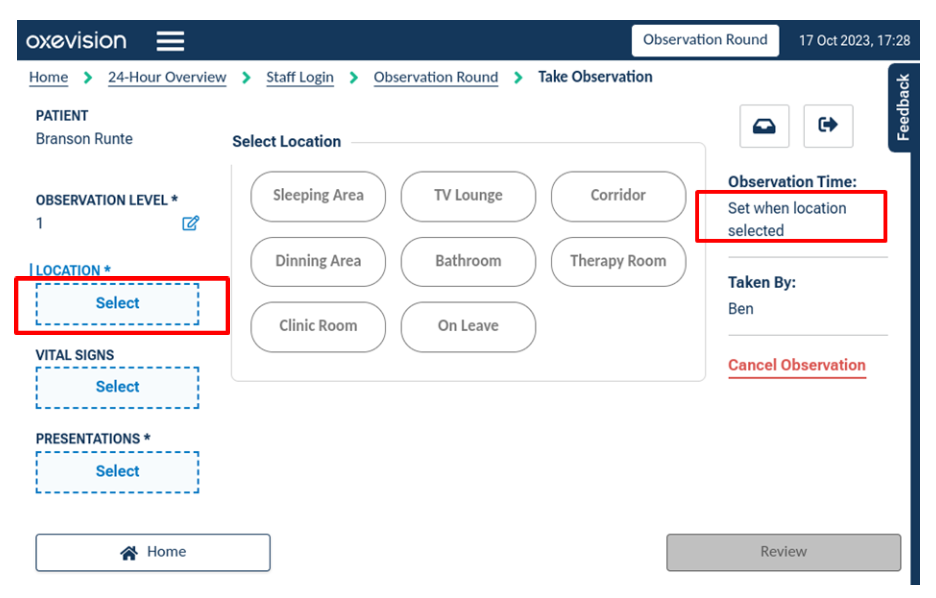
Selecting the location will populate the “Observation Time” on the right.
Step 7 (optional): If the patient is in their room you can proceed to take their Vital Signs (if the patient is in any other location, you can skip this step). Select the box on the left under “VITALS” and then select “Take Vital Signs”.
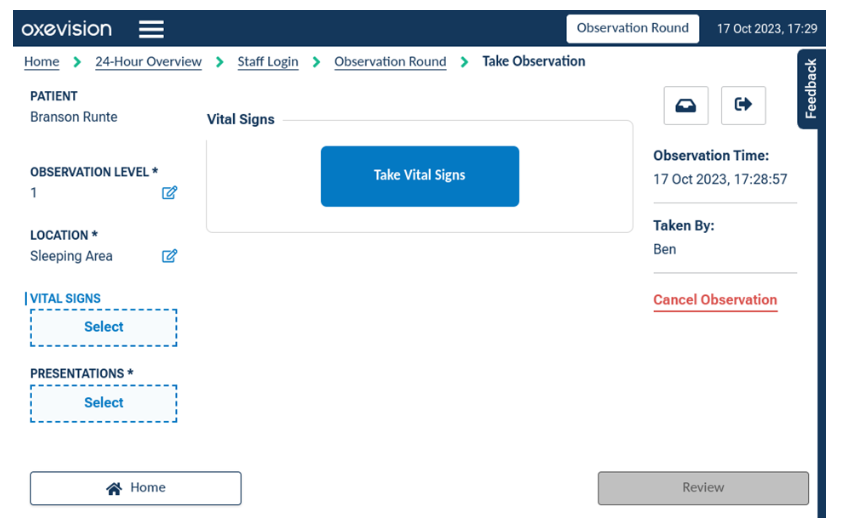
Please refer to the ‘How to take a Vital Signs observation’ module for a step-by-step guide on how to take a patient’s Vital Signs. Once you have taken a patient’s Vital Signs, they will appear on the page.
Step 8: Select the box on the left under “PRESENTATIONS” and then select any appropriate presentations for the patient. You can also select “Comments” which allows you to enter any additional information required to support your observation protocols.
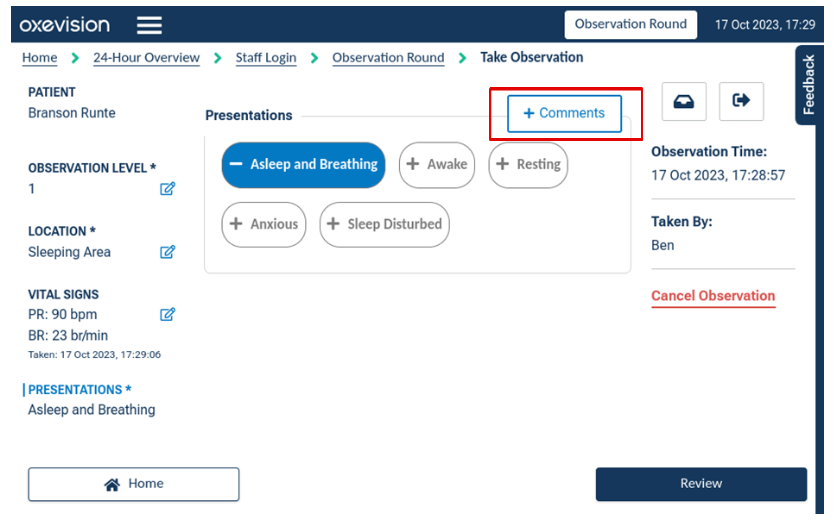
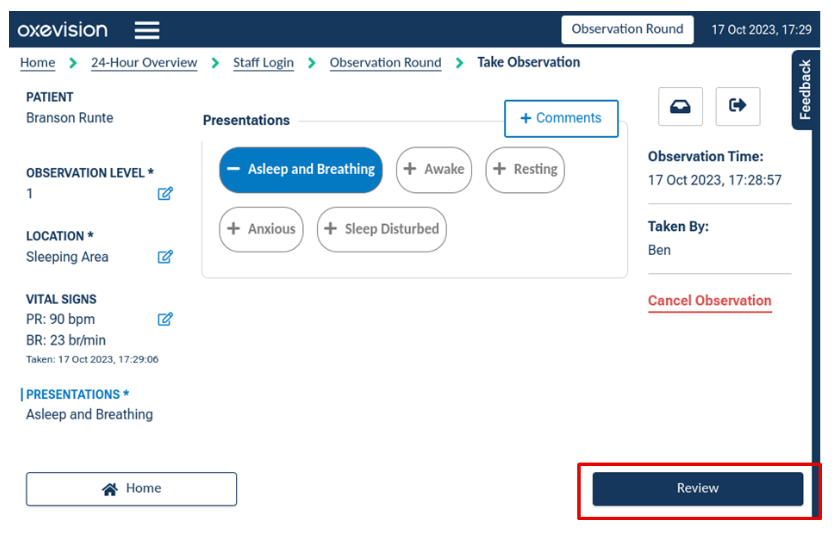
Step 9: Once you have completed all of the required information (the observation level, location and any presentations/comments), the “Review” button will turn blue so that you can proceed to submit your observation. Select the “Review” button when you are ready.
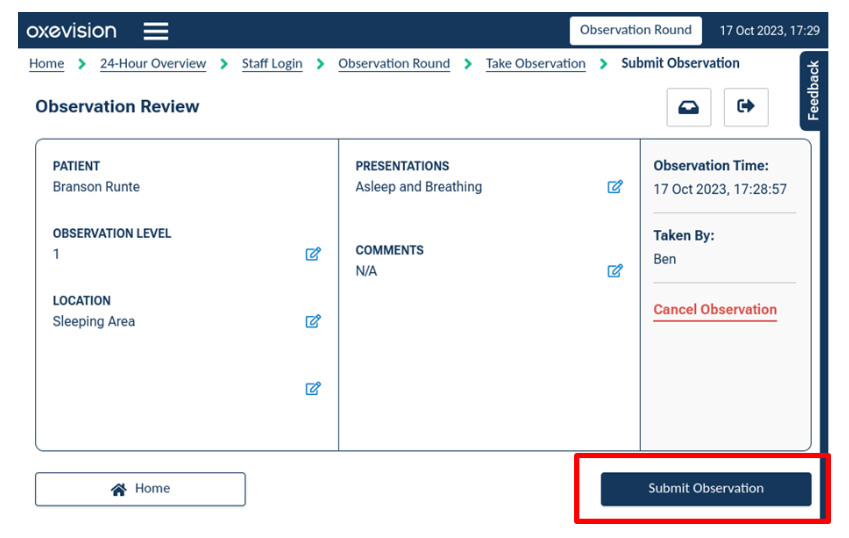
Step 10: You will be shown an overview of all the details you have entered for the observation. You can edit any information by selecting any of the corresponding blue edit icons:

... When you are ready to submit your observation, select the “Submit Observation” button.
Please note: If you select the “Home” button or the “logout” icon:

... at any time before you have selected “Submit Observation”, you will receive a warning message - an example of the type of message you may receive is provided below.
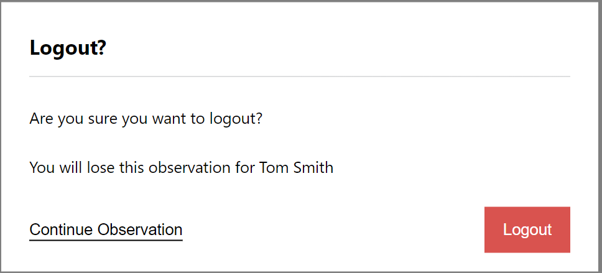
Please select “Continue Observation” and review the observation, making sure you select the “Submit Observation” button mentioned in Step 10 if you do not wish to lose any of the information you have just entered.
You will be returned to the Observation Round page. From here, you can complete the observations for all other required patients by repeating steps 4-10 above.
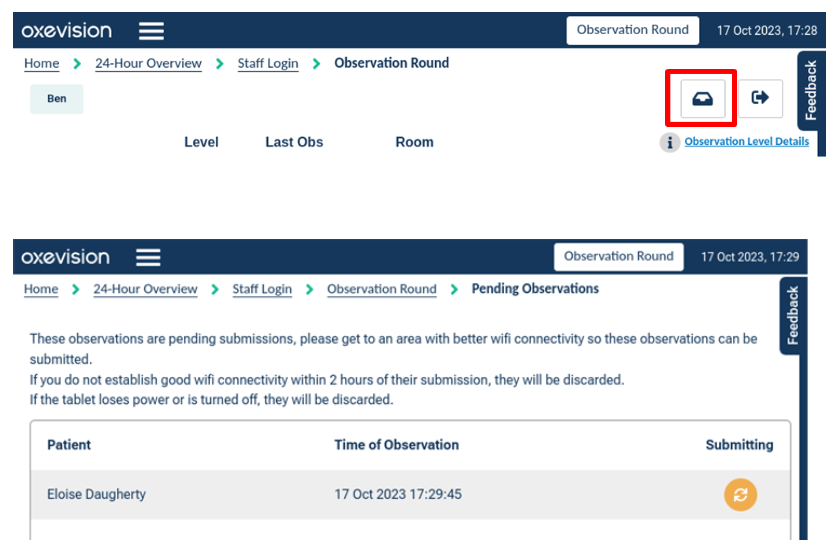
The “Pending Observations” outbox
If you submit observations when you have low/no wifi connectivity they will be held in the “Pending Observations” outbox until sufficient wifi connectivity is established to allow the submitted observation(s) to fully complete.4
When observations are held in the “Pending Observations” outbox, the “Pending Observations” icon in the top right will display the number of observations that are pending. Selecting this icon will open the “Pending Observations” outbox which will display all observations that have not yet been submitted and the time that they were taken.
4
Your organisation may require you to establish wifi connectivity within a set number of minutes or hours before any observations in the Pending Observations outbox are automatically discarded. If this is the case, you will see a message advising you of this exact timeframe under the “Pending Observations” title.
Please note: You can navigate away from the Oxevision Observations module and submission of any pending observations will still be completed whenever wifi connectivity is re-established. When wifi connectivity is re-established, the “Successful, Observations submitted” notification will be displayed on the device that the observation was submitted.

You must be trained to use the system. Your Oxehealth Ward Lead can arrange this for you – or ask your manager.
Up next

